 When it comes to getting the most out of your PC, it pays to know how far you can your hardware. That’s why stress testing your PC is a great idea if you’ve just recently built a new PC or if you’re wondering how stable your system really is.
It’s also a good idea to monitor your PCs various metrics (like temps, voltages, etc) when testing/overclocking, so this post will not only show you the best tools for stress testing, but also the best tool for monitoring your PC.
What is stress testing? Basically, it’s the process of simulating a very demanding task to push a component to its limits; this is done for a few reasons, primarily to test the viability of an overclock or to check for instabilities within your system.
Stress testing your PC isn’t a difficult task by any means, but it can be time-consuming as well as hard on components, especially older/well-used components.
Things to consider
- Most of the time, stress testing does not represent a real-world usage scenario for the vast majority of users. Chances are, you’ll never push your PC as much as it’ll be pushed during a test.
- Ideal max operating temps (post-2016) for most newer processors is within 70-90c
- Ideal max operating temps for most newer graphics cards (post-2016) is 70-85c
- While stress testing, always run a hardware monitoring utility so you can make sure temps aren’t spiking – chances are things will shut off before any thermal damage occurs, but it’s best not to risk it by letting something run too hot for too long.
Without wasting any more time, we’re going to jump right in. We’ll start with the best hardware monitoring tool, and then we’ll talk about CPU, GPU, and RAM testing.
Hardware Monitoring
HWMonitor
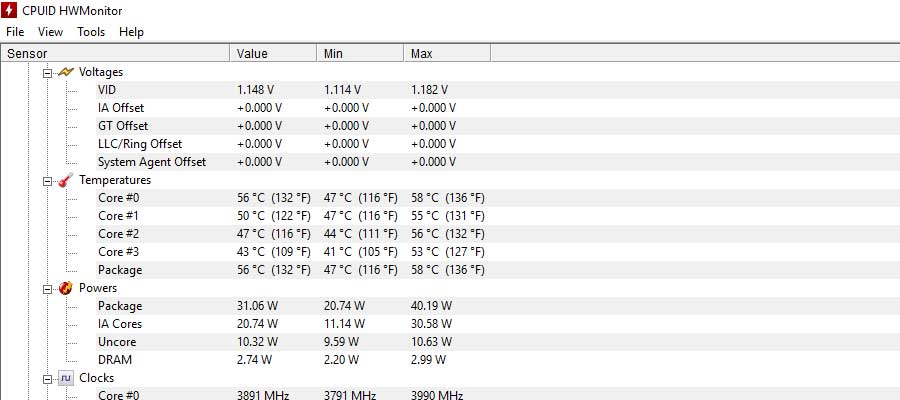
There’s really only 1 tool you need to monitor your system’s thermals, voltages, clocks, fan speeds, etc. That tool is CPUID’s HWMonitor. It’ll give you all of the info you need to effectively monitor everything important on your PC, including but not limited to your graphics card, processor, storage, motherboard, and fans.
CPU Testing
AIDA64
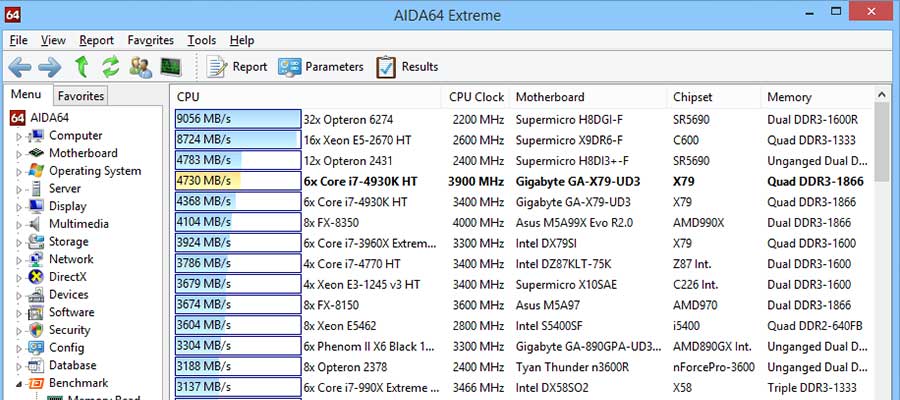
AIDA64 is more of a full stress test and diagnostics suite than anything, but I’m putting it under CPU testing anyways. It can stress your CPU, RAM, graphics cards, and even your cache which makes it an extremely versatile and useful program to have if you’re going to be stress testing. But, all of that testing goodness doesn’t come for free, the least expensive option for AIDA64 is about $40.
Prime95
Prime95 is the most popular (and oldest) free CPU stress test utility. It’s able to effectively push your CPU to its limits by forcing it to calculate prime numbers, specifically Marsenne prime numbers. Generally speaking, a 3-hour run of Prime95 is enough to determine that your CPU isn’t toting any instabilities, but some recommend as much as a 6-hour run for maximum effectiveness. Personally, I’ve only ever run Prime95 for a maximum of 3-hours.
GPU Testing
Unigine Heaven
The most common free GPU benchmark/stress test you’ll see showcased around the web is without a doubt Unigine Heaven. Although considered more of a benchmark than a stress test, due to the intracite scenes rendered and Heaven’s ability to be looped for hours on end it works great as a “real-world” type of stress test as well. If you can run Heaven for multiple hours in a row, your graphics card will have no problems handling your 10-hour PUBG benders. There’s also Unigine Valley, which is basically the same thing with a different set of scenes.

Get Unigine Heaven
Get Unigine Valley
Cinebench
Cinebench is a free GPU and CPU stress testing utility that you’ll see used by most reputable reviewers. It’s able to individually push your CPU and GPU to their limits through a couple of complex scene renderings.

FurMark
If you have a newer graphics card and you want to push it as hard as it can go, FurMark is the program you want to run. It’s easily the most demanding GPU stress test available, and its also free. That being said, older cards will not fare well against it, FurMark has been known to fry old cards without adequate overvoltage protection. If you’re going to run Unigine Heaven (or Valley) there’s really no need to run FurMark as well, unless you really want to torture your PC.

RAM Testing
Memtest86+
If you’re going to be overclocking your RAM, you should definitely be stress testing it to make sure your voltages and timings aren’t too overzealous. Even if you’ve just built a new PC, you should probably stress test your RAM to make sure it’s not faulty. Memtest86+ is the tool I most prefer when it comes to stress testing RAM, not only is it free, but it’s very thorough and is guaranteed to let you know if your RAM is weak. But, it’s a little more “involved” than the other tests in the sense that you have to install it onto a bootable flash drive, reboot your PC, enter the BIOS and change your boot order to load from USB, and then reboot your PC again with the flash drive inserted – this will start the test.
Workload Testing
PCMark 10
If you want to test your entire system across a variety of real-world type workloads, PCMark 10 is what you need. It isn’t really a stress test, per say, but it is an effective tool to test how your PC will handle different workloads like image editing, content creation, gaming, web-browsing, and even app startup time. Unfortunately, PCMark 10 isn’t free and it comes with a price tag of about $30.

Conclusion
Regardless if you’ve just built your PC, or you’re going to be starting some heavy overclocking, it always pays to stress test your PC before you get too far ahead of yourself. Not only will it let you know if you have weak (or faulty) components somewhere in your system, but it’ll also give you an idea of how far they can be pushed before completely crapping out on you.
Just don’t forget to keep an eye on the temps of the component(s) being tested with HWMonitor!
