If you want to learn exactly how to stream on Twitch using OBS, I’ve got the perfect guide for you. Within this formidable essay, you’ll learn exactly how to launch a new stream from start-to-finish using OBS and a single computer.
While poking around the interwebs, you’ve probably heard of something called Twitch. If you haven’t, where have you been? Twitch is a platform that allows anyone, particularly gamers, to easily live stream their experiences in a community-focused manner. Originally, Twitch was dedicated solely to gaming content but has since expanded to include all kinds of content.
Chances are, you knew a lot of that already. That’s why you’re trying to learn how to stream on Twitch!
What you might not know is that streaming on Twitch is easier than ever and almost anyone can do it. All you need is adequate hardware, fast internet speeds, some streaming software or hardware, and a Twitch account.
This guide will cover everything you need to know to get a Twitch stream off the ground from start to streaming.
If you have any questions, feel free to ask in the comment section!
Is your PC good enough?
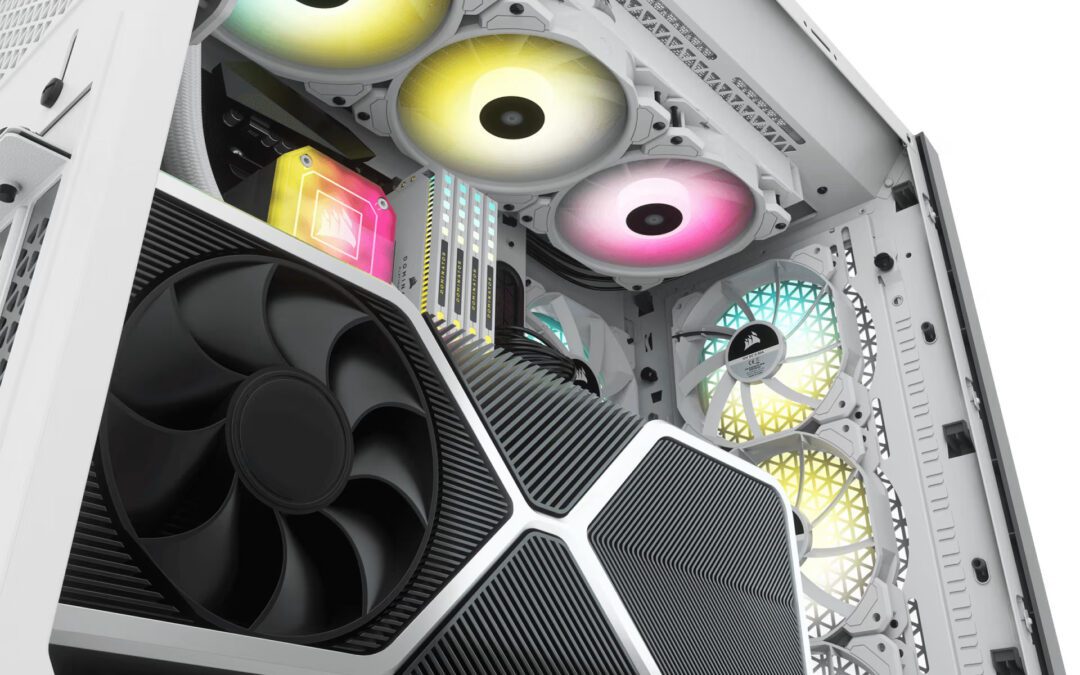
Before you even worry about setting up your Twitch channel itself, you need to make sure your computer can handle the extra workload that streaming creates. If you have subpar hardware, your viewers are going to have a subpar viewing experience and your channel will flop before it ever gets off the ground. This is definitely not what you want, so let’s make sure that your PC is up to the task before getting too far in.
If you want the highest quality streaming experience for your viewers, it’s important to have some relatively powerful hardware. At the time of this article’s writing, Twitch recommends you use an Intel Core i5-4670 or AMD equivalent CPU, at least 8 GB of DDR3 SDRAM, and at least Windows 7.
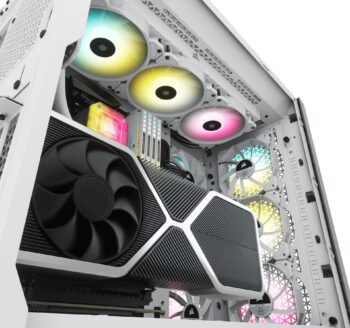
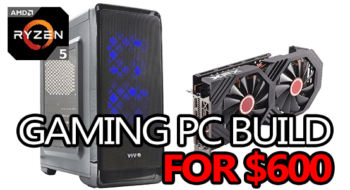
But, since that’s some pretty old hardware in terms of what’s current, here’s my suggested starting point for a streaming build. I’m not saying build a whole new PC to stream with, but if you have to that’s a good starting point.
If you have absolutely no clue what’s inside of your PC, you should really figure out your specs before moving on; either check your manufacturer’s website, run “dxdiag”, download a CPU monitoring tool, or read the manual if you have one.
Once you’ve determined that your PC is definitely good enough, it’s time to move on!
Is your internet connection good enough?
This might seem like an obvious point, but it’s often overlooked until an issue pops up. If your internet connection isn’t fast enough to push your stream then image quality will drop and your viewers will have a bad experience. Any viewers you have will then close your stream and move onto a better one. That’s not what you want.
To avoid losing viewers due to a bad experience caused by a subpar internet connection, you want to make sure it’s “good” before running your first stream. You can run a speed test on a number of sites like Speedtest.org for a quick check, but getting the info right from your ISP is generally more reliable. A 3.5Mbps upload speed will suffice, but you should have at least 5Mbps if you want to stream your gameplay on the recommended settings (more about that below).
Lastly, try to avoid streaming while using a WiFi connection. If you absolutely have to and have zero options, then I guess you have to. But, if you have the option of running a wired connection definitely do that instead. WiFi is okay, but it introduces A LOT of variables that could negatively impact the quality of your stream, best to just avoid that altogether.
Make your Twitch Account
You probably already have a Twitch account, but if you don’t this is the best time to make one because you’ll need to use it for the next steps. Simply navigate over to Twitch, set up your account, and then we’ll move onto the fun stuff.
How to stream on Twitch with OBS
After you’ve determined that your equipment is acceptable, your internet connection is good enough, and you’ve made your Twitch account, now you need software that can capture your gameplay and effectively send it to the Twitch servers. Today, we’ll be using Open Broadcaster Software (OBS), which is not only free but extremely popular – by far the most used encoding software.
Go ahead and download OBS from the link above and then make sure to “Run as administrator” – right click the icon on your desktop and click “Run as administrator”. This is important so that OBS can properly capture your gameplay. Once it opens, you’ll be greeted with a mostly empty screen giving you an array settings along the bottom. Welcome to OBS.
Setting up OBS for Twitch
By now, you should have a Twitch account created and you should have OBS downloaded and installed. If not, do that first and then come back to this step.
1. Click Settings in the bottom right. This opens up the expansive number of settings that OBS comes with.
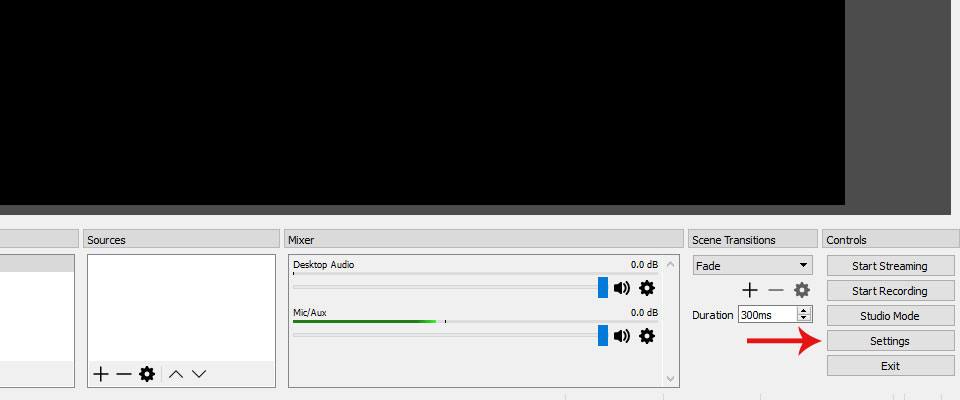
2. Click Stream on the left to open that settings panel. In the new panel, under Service, indicate Twitch as the platform you wish to stream to by clicking it in the drop-down menu. Next, you’ll see the Server drop-down menu. Scroll through the Twitch servers and select the one closest to where you live.
3. Return to Twitch, sign in, and retrieve your Stream Key. Head back over to Twitch, and log in. Look at the top right where it shows your username and icon, and click the drop-down menu. Select Dashboard. Go to Settings, and then click Stream Key, and Show Key. It will ask you to confirm that you know to NEVER SHARE your stream key with anyone. This is absolutely important, as that key gives them access to streaming content to your channel. Click that you understand and continue.
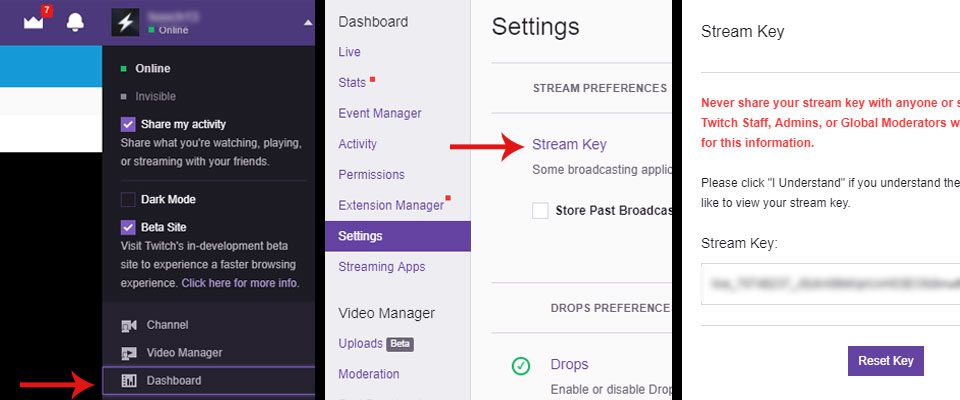
Highlight the entire key (including the word at the beginning, the hyphens, etc.), right-click the highlighted section, and select Copy. You can now close this tab.
4. Return to OBS, and input your Stream Key. Return to OBS, go back into the settings panel (which should still be open), and under Stream, click into the field labeled Stream Key. Right Click, and select Paste to insert your stream key (or ctrl+v). You’ve effectively told OBS where to send the awesome content you’re making! Congrats!
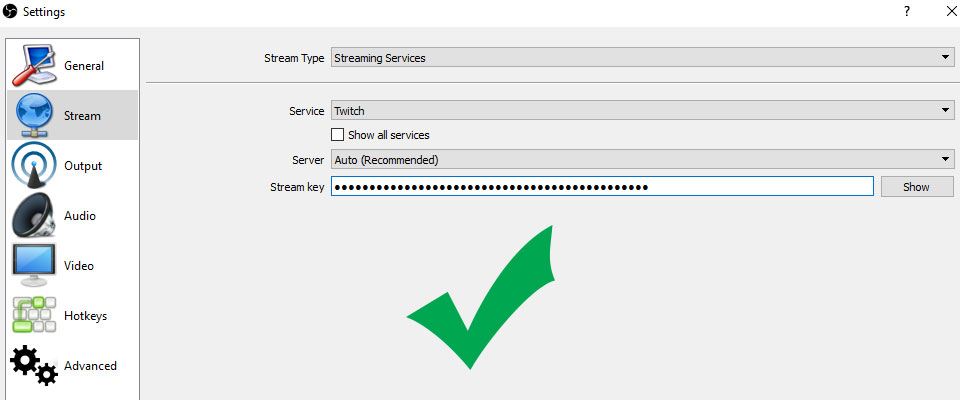
5. Go to your Output settings and tune your stream output. Go to the next large tab on the left labeled Output. The first option, Output Mode, should be left as Simple for now. The next really important thing to adjust is called your bitrate.
Without all the technobabble, your bitrate is essentially how much information you’re capable of sending to the Twitch servers per second. Bitrates are a very in-depth and intricate subject so if you want to learn all of the intricacies (you should) go check out this article. Basically, if you set your bitrate to 3500 you’re sending 3500 kilobytes of data per second to the Twitch servers.
Most people will have more like a 5-15Mbps upload speed, but still, make sure to double check so you know exactly what you’re working with. Websites like Speedtest can help, but you’re usually better off getting your info right from your ISP.
This is important because the more information you can send to the servers, the smoother your stream will be. Think of this just like getting a reception for your TV. If there’s a lot of information (a 4K movie for instance) trying to come through but your internet speed can’t handle it, there will be hiccups and interruptions like fuzzy image quality or choppy playback – it’s the same kind of idea if your ISP can’t handle what your stream requires.
Maybe that isn’t the best depiction, but it should be enough to give you a solid idea of why bitrate and ultimately your internet speed is so important when streaming on Twitch.
So, what bitrate do you use? It is recommended that you set your bitrate for streaming at 80% of your internet’s upload speed, or 3000-3500, whichever is lower. This will not directly affect your system, but it does affect your stream. You can always check your internet service provider’s (ISP, like Verizon, etc) package that you pay for to determine your upload speed or use another third-party service.
Here are the most commonly recommended bitrates for each resolution type:
- 1080p – 3000-3500+
- 720p – 1800-2500+
- 480p – 900-1200+
- 360p – 600-800+
You should shoot for 720p as a starting resolution if possible, 60fps is suggested for fast-paced games (primarily shooters and racing games) but 30fps will work for pretty much everything else. Anything lower and you’ll see a distinct loss of quality. However, if you are using a lower-end computer and have less than desirable internet, 480p and 360p are workable. You can always upgrade later if you find you love streaming as much as you think you will.
Leave all of the other settings under Output as they are.
6. Head to the Video tab, and select your output resolution. Go down to the Video tab on the left, and click on it. Here you’ll find your Base Resolution and your Output (scaled) Resolution. Your Base Resolution is the resolution of your computer’s monitor, what you actually see. Your Output (scaled) Resolution is the resolution of the stream that viewers will see.
Remember above when you saw some recommended bitrates for each resolution setting? Here is where that comes into play. Depending on which one you chose, you should select the corresponding downscaled resolution here.
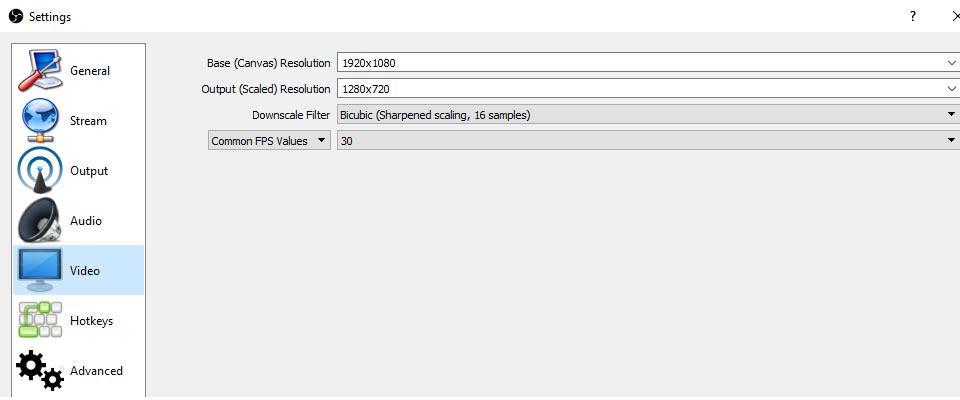
For example, if you chose a bitrate of 2400, you should select to downscale your resolution to 1280×720 (720p). This is something you can play with and adjust as you need to, as you stream. Leave all the other settings alone.
At this point, make sure you press APPLY in the bottom right to apply these settings before closing the Settings panel! This saves your progress.
7. Set up your first Scene with Sources. Now that you’ve got all that setup, how does OBS know what to actually send? You tell OBS what to transmit by way of Sources. In essence, when you select something as a Source, you allow OBS to target and record/stream whatever that is. This could be your game, a web browser, your microphone or webcam, and even images! For now, let’s set up a game source, a microphone, and a webcam as Sources.
To set up your game source, right-click within the Sources panel, select Add, and then Game Capture. Name it whatever you want (I would suggest the name of the game you plan on streaming during your next session, or just “GAME”), and press OK.
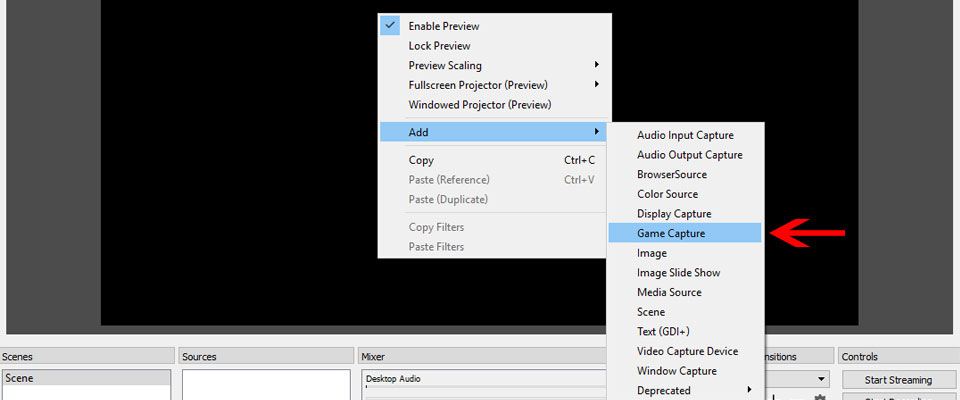
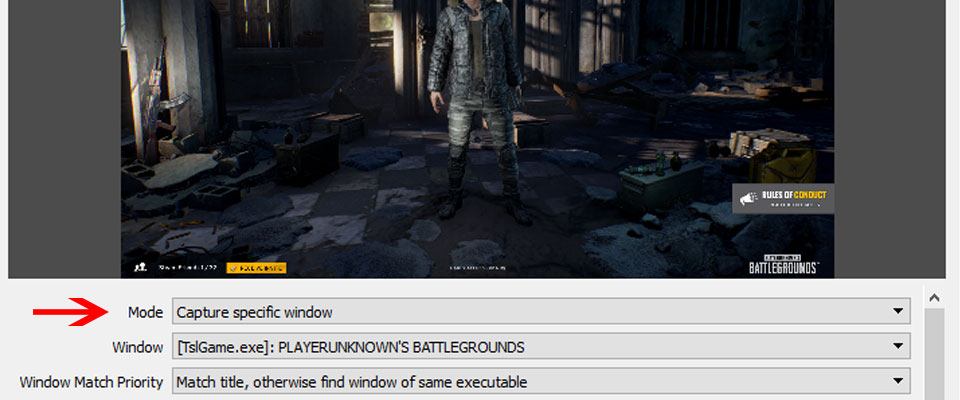
Change the Mode from “Capture any fullscreen application” to “Capture specific window“. A new drop-down menu, Window, will appear. Click there and select your game (which must be open and running, or OBS won’t detect it). Now press OK to confirm. You should now see your game’s screen in the live-preview panel at the top of OBS. If OBS doesn’t detect the game, try changing your game’s resolution to Windowed Fullscreen, as this helps in many cases.
To set up your microphone source, first plug your microphone into either the USB port or the microphone jack, depending on how your mic works best. Then, again right click under Sources and select Add and Audio Input Capture. Name it whatever you want (I would suggest “Microphone” or the name of your microphone, such as a Blue Yeti) then press OK.
You should see a new panel appear with a drop-down menu named Device, currently set to Default. Open the drop-down menu and select your microphone, then press OK. If your microphone is unmuted and plugged in, you should now see the Mic/Aux bar moving when it detects sound. If the bar isn’t moving, make sure the mechanical “Mute” button on your microphone is off and that all connections are completely plugged in.
To set up your webcam feed as a source, first, plug your webcam into the USB port on your computer. Then, again right click under Sources and select Add, and Video Capture Device. Name it whatever you want (I would suggest “webcam” or the name of your webcam), and press OK. Now select your webcam from the Device drop-down menu, and press OK.
What you may notice is that your game doesn’t fill the whole preview, or your webcam is overlapping your game screen too much. Or, what if you can’t see your webcam at all?! That is probably because of the order in which we created the Sources. OBS stacks them on top of each other, so the uppermost Source will be on top of the second one, and both of those are on top of the third one, and so on. This is somewhat like stacking papers in a folder.
Left click on the topmost Source, the Game Capture Source in this case. You should see a thin red outline in the live preview section now around the came capture. Click and hold on the corners of the red outline to resize your game capture, or on the middle of the red outline to re-position the game capture.
Click on the Video Capture Device Source now, and go through the same process of resizing and re-positioning to your liking using OBS’s live preview.
You’ve successfully setup OBS, congrats!
Time to stream!
The hard part is over! Head back to Twitch, and back to your Dashboard. You can do this by going to Twitch, click on your username in the top right, and then click Dashboard.
Under the Live panel, you have a vast number of things to fiddle with. For now, look on the left-hand side under Stream Information. Here you can add a title to your upcoming stream, select a game to be section into (so viewers can find you), and a community if you are part of one. Make sure that you click Update Information when you’re done.
That’s it! You’re ready to run your first stream on Twitch! Go back to OBS and click Start Streaming (on the right) if everything looks awesome. Now, you’ll be able to see live information about your stream on your dashboard such as viewers, followers, and your stream’s health.
You may experience some issues at first with lag and/or a choppy stream or maybe another issue. The best thing you can do is test first! Adjust your settings in OBS with a friend’s help as you work on getting those perfect settings nailed down. The perfect settings for a stream are by no means universal and what works for person A might not work the same for person B.
Whats your motivation?
Before we get into the nitty-gritty of streaming, it’s important for you to have a clear reason as to why you want to start live streaming. There are no wrong answers here, this is just to guide yourself later on.

Do you want to stream to have a good time hanging out with other gamers?
To make a living doing something you love while providing evocative content for viewers?
To share expert tips and tricks that you’ve gathered over years of hard work and sleepless nights?
Whatever your reason, keep this in mind as you read this guide and experience your first days and weeks of streaming throughout the near future. Not only will it help motivate you, but it should help give you more to work towards and focus on.
Conclusion
By now, you should not only have your own Twitch channel up and running, but your stream should be fully operational or close to it! I hope this post was able to teach you exactly how to stream on Twitch using OBS and show you what you need to be good. If you feel I overlooked something, feel free to let me know in the comment section!
Remember, streaming should be fun and foster a sense of community. Play games you enjoy and be genuine. People will feel your energy and respond with the same kind of emotions! Respect your viewers, and listen to their feedback about the stream. If they care enough to say something, they care.
Don’t forget that everyone was new once, and you can (politely) ask other streamers for advice. Some may not answer you right away, while others will respond immediately. Check out YouTube and Google for more resources and solutions!
Resources:
Open Broadcaster Software Beginner Video
Speedtest Note: Speedtest is not perfect, you will get a more accurate representation by contacting your internet service provider.
hmmm im confused how does this work if im gaming on a console like xbox?
Thank you, this is exactly what I was looking for! But whats the best mic and cam? I tried to use an old cam that I had sitting around but it didn’t look good or sound good. thanks in advance
Hey Elijah,
Awesome, glad to hear it helped! Hands down the best mic, in my opinion, is the Blue Yeti – you’ll also want a pop filter and maybe some kind of stand/mount depending on your desk setup.
The best webcam would have to be the Logitech C922x, but the slightly cheaper C920 would also work well.
Hope that helps!