This ultra-cheap Ryzen 3 3200G PC build is going to surprise you! For right around $350, you can put together a PC capable of 1080p gaming without an issue! It doesn’t even need a graphics card!
As long as you don’t expect The Witcher 3 to run at 1080p 60fps on this ultra budget PC, then it’s not going to let you down. It’ll easily support an upgrade to a stronger Ryzen CPU and it also has plenty of room to add a dedicated graphics card down the line – a GPU should be your first upgrade.
Without wasting any more time on this intro, let’s jump into the build! Check the tabs below for a list of the basic items you’ll need as well as the steps required to build this PC. If you need a more detailed explanation, check out this build FAQ and this guide.
Have a question? Ask me in the comment section!
Ultra-Budget PC Build for under $350
Updated: March 26th, 2020
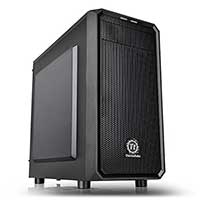
Thermaltake Versa H15
mATX case, 15” x 7. 8” x 16. 2”/ 7. 8 lbs. 1 120mm rear fan, 4 USB ports, and a 3 year warranty View

ASRock B450M Pro4
A good mATX sized, AM4 socket, B450 chipset motherboard. View
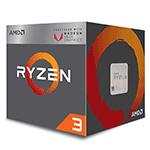
AMD R3 3200G
3.6GHz AM4 socket APU. 4-cores 4-threads. Integrated Vega 8 graphics. Comes with a CPU cooler. View

Thermaltake Smart 500W PSU
500W 80+ Bronze non-modular power supply. Comes with a 5-year warranty. View
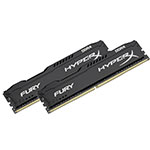
8GB Kingston HyperX FURY DDR4 RAM
2x4GB 3000MHz DDR4 RAM. Dual rank, dual channel pair. View
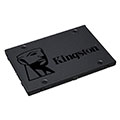
Kingston A400 240GB SSD
A lightning quick 240GB SSD. Up to 10x faster than a conventional HDD on average. View
The tools you need:
- A small Phillips screwdriver
Size #2 works well as a general rule. - An anti-static wristband
Optional but recommended. - Patience
And lots of it.
That’s really all you need to assemble your new desktop. All of the mounting hardware and cables will come with the parts listed above. The only time you might need something extra is if you’re modifying the build on this page.
Super Simplified Build Steps:
- Install the power supply into the case
- Install the processor (CPU)
- Seat RAM in the motherboard
- Mount the CPU cooler (don’t forget thermal paste if you’re not using a stock cooler!)
- Insert the motherboard’s rear I/O plate into the case’s rear I/O slot
- Mount the motherboard in the case (get your i/o ports through and use the middle standoff as a guide)
- Plug your graphics card into the motherboard
- Install storage drives
- Plug all power and data cables in where they’re required (storage, case, motherboard, graphics card, etc)
- Turn your PC on
- Install your OS
- Install and update ALL drivers
- DONE!
In-depth Walkthrough
If you’ve never built a computer before, then you probably want to take some time to learn the basics before getting ahead of yourself. To do that you have a couple of options you can choose from.
The first, and probably the easiest way for most people to learn is finding a walkthrough on YouTube from a reputable tech channel. Here’s one by BitWit as an example.
Alternatively, I’ve put together an in-depth guide on how to build a PC as well as a FAQ to address the most common questions and problems. I’ve also put together a short post covering 10 of the most common mistakes people make when building.
Recommended Add-ons
Below you’ll find some suggested add-ons for this build, some I’ll mention more in-depth further down this page, but some are pretty self-explanatory like optical (DVD/CD) drives. Although not entirely necessary, optical drives can sometimes come in handy and I strongly recommended having one; if you have an old PC kicking around, it’s optical drive will more than likely work for you and you won’t need to buy a new one.
Windows 10 (USB Installer)
Windows 10 is your best bet when it comes to picking an operating system. This version is a USB installer. View
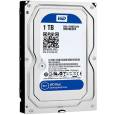
WD Blue 1TB HDD
For a bit more than the 320GB HDD, you can upgrade your build to 1TB. If you can, I would strongly suggest this over the 320GB HDD. View
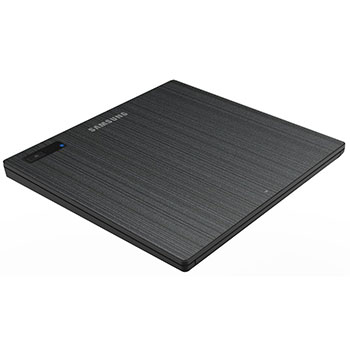
Samsung Ultra-Slim External CD DVD±R/RW
A lot of people are moving away from internally mounted optical drives, and it’s easy to see why! This one is definitely one of the cheaper & better external optical drives to consider. View
Build Breakdown
This little budget build is everything you need if you’re trying to get into PC gaming for as cheap as possible. There are ways to go even cheaper, like downgrading the APU to something less powerful, but then you’re sacrificing very important (and much needed) gaming potential.
Keep in mind that the price listed above is only for the core components – you will still need to add an operating system and any peripherals you don’t already have (mouse, keyboard, audio, etc).
Case: This ultra-budget gaming PC build is running a fairly basic case from Rosewill. Their SRM 01 is a basic mATX case with the most basic options you need for this build. It has enough room for everything and even comes with a single fan.
That being said, in a build like this it’s better to get a good case with enough room to “grow” into. Buying a cheaper, smaller case only limits your ability to add graphics cards, aftermarket CPU coolers, etc. That being said, your case is what you see every time you look at your PC, so you should make sure you’re building inside of one that you like!
Motherboard: The ASRock B450M Pro4 is a good mATX-sized motherboard that delivers all of the features you’ll need for an AM4 socket build like this; including the ability to support processor overclocking.
With it, you’re getting integrated audio, a built-in ethernet controller, plus 4x SATA headers and 1x M.2 ports for storage, basic 2.1-channel audio, a total of 8 USB ports, and enough fan headers to support this build.
The B450M Pro4 is also one of the few “budget” B450 chipset boards to feature actual heatsinks on the VRMs.
Processor: The 3.6GHz Ryzen 3 3200G from AMD is an awesome processor for what it is. The 3200G is what’s referred to as an APU (Accelerated Processing Unit), it’s effectively a GPU and CPU mixed into one chip. This is what will be handling ALL of your graphical and processing needs until you add a dedicated graphics card.
In more demanding games, or AAA releases, the 3200G is more likely to hold around 30fps in 1080p, just for reference value.
In terms of cooling, you’re getting a pretty good Wraith Stealth CPU cooler from AMD, but if you’re going to be overclocking it would be wise to upgrade. If that’s you, check out the best CPU coolers!
Graphics Card: The one major caveat with this build is that it has no graphics card.
However, it does have the R3 3200G’s integrated GPU as you saw in the previous section. It’s not going to give you quite the same experience as a discrete GPU while gaming, but it will be enough to play most games without too many issues. Basically, it’ll work well enough until you’re ready to install a discrete GPU of your own.
RAM: When it comes to RAM, 8GB is the baseline for any gaming PC build in 2019. With that in mind, this build is running 8GB of 3000MHz DDR4 RAM in a dual channel configuration of 2x 4GB sticks.
If you want to add more RAM, you should know that the motherboard will support 2 more sticks; ideally, they should be the same speed.
Power Supply: There are a lot of high-performance parts in this build, so its fair if you’re assuming its going to need a gigantic power supply, but luckily it won’t!
At most this build will only use a few hundred watts of power, so an 80% efficiency 500W supply will do the trick just fine.
I’ve picked Thermaltake’s Smart 500W 80+ Bronze PSU which is a good budget option offering more than enough connections for everything you need, it also comes with a decent 5-year warranty just-in-case the worst were to happen.
Storage: For storage, I opted to load this build with a 240GB SSD. For one, SSDs are significantly faster than HDDs – the difference is mind blowing if you haven’t used one. For two, 240GB is often more than enough space to get a build up and running and install a handful of games.
Luckily, storage is the easiest part of a gaming PC to “upgrade”. It’s simply a process of plugging a new drive in and voila, you have more space.
All-in-all, this build serves as a great foundation to start with for any aspiring (and frugal) PC gamer. It can be expanded and upgraded into a really solid 1080p-144op gaming PC by simply adding a graphics card like the GTX 1660 Ti.
Operating System
When it comes to picking an operating system, you have quite a few options laid out before you. But, the best / easiest two are either Windows or something Linux-based.
If you’re really strapped for cash, or you really just don’t like Windows, Ubuntu is a great option because it’s entirely free, and it’s really solid/secure. It’s a Linux-based OS and can play any game that supports Linux. More and more games are adding Linux support, but it definitely sucks when a game you’ve been waiting forever for ends up being Windows only…
The more expensive option is buying a copy of Windows. With DirectX 12 becoming more common and it being a Windows 10 exclusive, you might want to consider jumping on that right away, but it’s ultimately your call.
Installing your operating system can be done in a couple of different ways, either by DVD or a USB flash drive that you either create yourself or buy. Either will get the job done, but going for Windows & using the retail DVD (or USB flash drive) is going to be the easiest – any cheap DVD drive will work for this.

If you want to create your own USB flash drive to install something like Ubuntu from, you can find some decent instructions here.
Peripherals
If this is the absolute first gaming PC you’ve ever owned, then chances are high that you don’t have a very good keyboard + mouse combo, or that your monitor is sub-par to really enjoy your experience.
If this is the scenario that you’re in, then we have some really awesome suggestions for you to consider. Each peripheral was hand-picked for this build and they’re all guaranteed high quality.
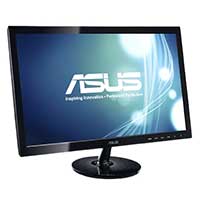
ASUS Asus VS247H-P
23.6″ 1080p 60Hz monitor, 2ms response time – Inexpensive and great for gaming! View
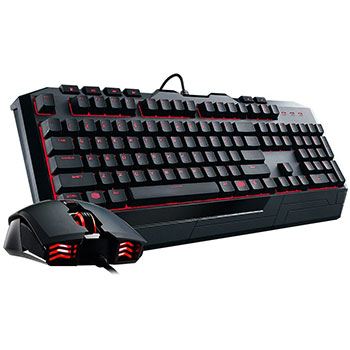
CM Storm Devastator 3 KB+M Combo
An awesome keyboard + mouse combo from Cooler Master for around $30! Available with red, green, or blue backlighting. View

Creative Sound BlasterX Blaze
A very affordable headset with a better-than-average mic and good sound quality. View
WiFi
Since the motherboard in this build does not have built-in WiFi (most don’t) you will need a WiFi adapter if you plan on using a wireless internet connection. That said, if you have the option to run a wired connection, do that instead because it will be faster & more reliable.
You have a couple options, you could get a decent USB-based WiFi adapter for about $20 that would work alright. Or you can get an internally mounted WiFi adapter that costs roughly $35, and will be more reliable than the USB option.

TP-Link TL-WN722N
A very affordable N150 USB WiFi adapter. Capable of 150Mbps on the 2.4GHz band. View
Conclusion
This build isn’t guaranteed to max games out in 1080p at 60fps, let alone in 720p. But, what it will do is give you a good foundation to build upon as well as get you into games on low-mid settings – in my opinion, gaming with low graphics is better than not gaming at all!
It will support various upgrades like adding a dedicated graphics card (recommended you do that sooner than later), upgrading to a stronger Ryzen-based processor on the AM4 socket, adding more RAM, adding more storage, and a whole slew of other upgrades.
At the end of the day, you’re not here because you have tons of cash to blow on the best PC out there, you’re here because you just want to enjoy PC gaming whatever way possible – that’s exactly what this build allows.
If you have any questions about this build, feel free to ask me in the comment section!
Not the build for you?
Your content goes here. Edit or remove this text inline or in the module Content settings. You can also style every aspect of this content in the module Design settings and even apply custom CSS to this text in the module Advanced settings.

Do not use this website, use Tech Guided instead.
Can I put 2 more of the same RAM in it without it breaking or something?
Do you need a mounting adapter to mount the SSD in this case?
What would be a good 750W PSU for this PC? I’ve upgraded it a bit, but I need to find a better Power Supply for the upgrades, please respond fast.
What case would have better cooling
https://www.amazon.com/dp/B01MDS8L83?tag=georiot-us-default-20&th=1&psc=1&ascsubtag=trd-us-1100454536431102800-20
Or
https://www.amazon.com/MUSETEX-Computer-Translucent-Tempered-Pre-Installed/dp/B07MDFYW3N/ref=sr_1_7?dchild=1&keywords=Desktop+Cases&qid=1597508534&s=electronics&sr=1-7
And could someone suggest a way to have 4 monitors connected to my PC because right now I can only get 2 (I only have HDMI and VGA connectors)
What would a good upgrade for this pc, I got this graphics card https://www.amazon.com/XFX-Radeon-1286MHz-Graphics-RX-570P8DFD6/dp/B077VX31FZ and my pc randomly crashes.
What are some good cases for cable management?