If you're searching how to clean thermal paste, there's a good chance you're dipping your toes in building your own gaming rig, doing your own computer maintenance tasks, or actually doing something about your growing interest in overclocking.
How to Remove Thermal Paste in Simple Steps
Old, cracked, dried or wrongly applied thermal paste is one of the most common reasons why computers overheat. Inside it, the fan or other cooling system is actually not doing its job of preventing your PC or laptop from heating up.
If this is the case, it wouldn't matter if you used a top rated thermal paste in the past. You need to remove and replace the thermal paste with fresh application. We already covered how to apply thermal paste in detail. Here's a 12-step guide on how to remove it:
Step 1: Why You Need to Remove Thermal Paste
Decide if you really need to remove thermal paste. It isn’t as easy as stripping off a sticker stamped outside your CPU case. The process actually has several steps and requires extra care.
Thermal paste removal is necessary in these scenarios:
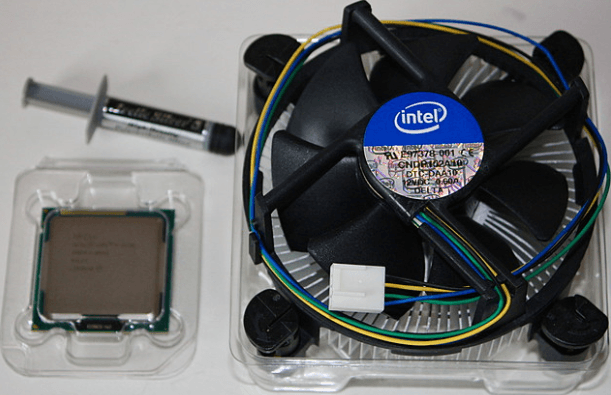
- You're building your own computer - Thermal paste is not a requirement for everyone building a gaming PC, but you will use it. Every CPU cooler has it pre-applied. If you're buying an aftermarket cooler, you'll most likely receive a thermal paste along with it (that you'll need to apply yourself).
- Anytime the heatsink becomes loose (or whenever you remove it) - If the heatsink gets dislodged either mistakenly or through regular wear-and-tear, you must remove the remnants from the old application and replace it. Leaving the heatsink loose could cause overheating.
- If the temperature of your CPU is getting out of control - Sometimes, the CPU heatsink becomes too hot to the touch that you'd need to check out what's happening. Don't just remove anything yet. Make sure to use CPU temp tools to double-check.
Note that contrary to popular belief, cleaning thermal paste off CPU won't result in improved performance. There has to be another underlying reason why the CPU isn't reaching optimal performance.
Step 2: Hardware and Software Maintenance
Do you need any software when removing thermal paste? Not really. There's an option to double-check CPU temperature with temp tools (even Windows has one built in), or monitor clock speeds with a program like CPU-Z. But these kinds of software are not necessary.
If you've confirmed that the old thermal paste requires a fresh application, it's time to learn how to clean thermal paste off CPU properly.
Step 3: How to Troubleshoot the CPU
You don't need to be a computer repair technician to know that something is wrong with your CPU if you're trying to turn it on, but it keeps on shutting off right away without warning.
There are two ways to know immediately if this CPU issue can be solved by cleaning and replacing thermal paste:
- Listen to the fan of your computer. If you boot up the computer, hear the fan spin, but then turns off quickly, this means your CPU is detecting a cooling or overheating problem.
- If the computer is shutting off immediately after you try to turn it on. Usually, the computer tries to go directly to POST (Power-on Self-test). But if the computer detects a damaged CPU, it will not POST as expected.
If none of these two issues is the culprit, you might need to dig deeper and open the CPU to check the cooling system, motherboard, or other components.
Step 4: Check the Heatsink Fan and Make Sure That It Is Seated
Before diving head on learning how to remove thermal paste from CPU, you should first check the heatsink fan.
Is it loosely connected to the CPU? Is it damaged?
First, you could go into your BIO and check CPU fan speed. If it seems to be working, but the CPU temperature is still abnormally high, go check the heatsink fan inside.
You must then check the fan to see if it is seated properly. If it isn't, clean it, reapply thermal paste, and make sure it is now connected much more stable to the CPU.

Step 5: Remove the Heatsink
Depending on what kind of heatsink you have, flip the latch or release the retention clips that keep the heatsink attached to the CPU.
Twist the fan or CPU cooler first clockwise, then counterclockwise. Repeat if that didn't loosen the connection between your CPU's lid and its heatsink.
Pull the heatsink slowly upward, but make sure not to pull the CPU with it.
Although you're going to be cleaning thermal paste off CPU later, this isn't the right time to do it. The dried or cracked paste could still be glued tight to the CPU. If you're not careful enough, you could accidentally damage the pins, or worse, pull the CPU out.
Step 6: Remove the CPU
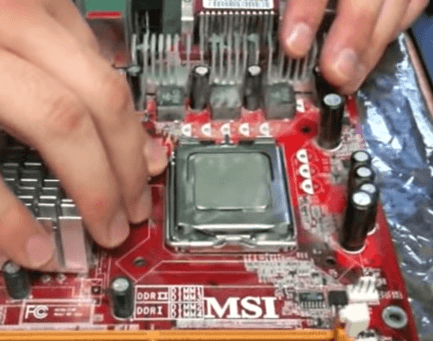
Now that you have the heatsink out, there is nothing stopping you from getting the CPU out except for a retaining latch. This is usually designed to hold your CPU securely in the socket.
Lift that latch softly. Determine if the latch needs to be twisted or moved slightly outward. If so, do it carefully. Most of the time, this latch would be under pressure.
For AMD CPUs, your best bet is to lift the CPU directly upward to prevent bended pins.
Step 7: Prepare to Remove Thermal Paste
Preparing your workspace and materials is the first step of how to clean off thermal paste.
- You'll need alcohol (preferably isopropyl alcohol that's around 70% to 90%).
- Paper towel or microfiber cloth
- A tube of thermal paste
The alcohol and paper towel/microfiber cloth are used for removing dried or cracked thermal paste that may still be stuck to your CPU.
Make sure you go to a well-lighted room when you’re cleaning off old thermal paste. You probably won’t remove all of the old paste completely, but having proper lighting could ensure you get at least all of the paste that is visible to the naked eye.
When choosing thermal paste, be careful with brands that are metal-based since they could damage hardware like your motherboard.
Step 8: Remove Paste
There really is no right and wrong way of how to clean thermal paste, or a product developed as thermal paste remover because you can use household products to remove old paste or compounds from the CPU.
Here's how:
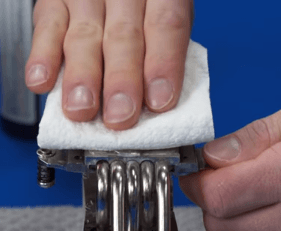
- Get your microfiber cloth or paper towel.
- Dampen your chosen medium with alcohol
- Check out the CPU, spotting areas with the most thermal paste. Rub these spots gently with your alcohol-dipped cloth/paper towel.
- Do this with the heatsink as well.
- You might need to go a second run for both the CPU and heatsink.
This step is extremely important, so take your time cleaning off your CPU. The new layer of thermal paste won't stick easily if the old chunks of paste are still there.
Step 9: Re-install the CPU
Now that you've cleaned off old thermal paste from the CPU, you can now reinstall it.
- Find the gold arrow on your CPU and align it to the arrow stamped onto the CPU socket. Depending on the processor and socket, this may be a triangle, notch, or other guide to help you place the CPU back into its proper placement.
- Handle the CPU on two sides and lower it downward slowly laying it down into the socket. Don't slide the CPU as this could damage the pins. Don't apply pressure or force when placing the CPU back in place.
- Finish up by closing the socket cover (or lowering the latch), which should place the processor securely on its original position.
Step 10: Apply New Thermal Paste
There are different ways to apply new thermal paste to the processor. You can spread it, use a brush to apply it, or wear latex gloves and your index finger to spread the paste. Some even dab a thick x-mark or happy face right in the middle of the CPU.
The most popular application method is to drop a thin, blob of thermal paste in the center of the CPU. Make sure you just place enough amount to prevent any spillage from damaging the motherboard.
If you're using a thermal paste that is not electrically conductive, thermal paste spilling over the edges shouldn't be an issue. Just gently rub off excess paste with your microfiber cloth and a bit of alcohol.
Step 11: Re-install Heatsink
Check if the heatsink is clean and dust-free.
Slowly lower it directly onto your CPU. Because the newly-applied thermal paste is still a bit wet, don't slide the heatsink when re-installing. Don't force it down either. Just let the weight of the heatsink spread the thermal paste and make it stick to the CPU.
Don't worry if excess paste leaks around the edges, just use your microfiber or paper towel to remove the leaks easily. Make sure your fabric or paper towel isn't dripping with alcohol when you do this, since a drop of alcohol could cause damage to other components.
To secure the heatsink, look for the latch and lock it in place.
Don't forget to re-attach the cables and anything else you removed when you initially pulled out the CPU and heatsink.
Step 12: Turn on and Test the PC
Close your CPU case and secure it with screws (if necessary). Connect all the cables back to their original placement.
Try turning on your computer. This will boot normally if you changed processors but kept your old motherboard. If it doesn't boot properly, check if your computer recognizes your newly reinstalled processor.
If you installed either a new processor or motherboard and the computer isn't turning on, you might need to reinstall your operating system.
Once your computer boots up normally, be wary of any noise from your fan or cooling system. This is often the first clue that you've made a mistake in any of the steps above.
