

Whether you're completely new to the PC scene or just building in general, learning how to build a gaming PC can seem like a really daunting process. But, I'm probably not the first person and I probably won't be the last to tell you that it's way easier than it looks.
This walkthrough aims to serve as not only a crash course to building an awesome gaming PC but hopefully as a reference tool if you get stuck along the way or you just need to double check something.
From assembly to drivers, we have a lot to cover! So, without wasting any more time let's jump right in with a basic overview of the components we'll be using before moving onto the more advanced (and fun) parts the build!
The Basics
Before you jump in head first, you should probably make sure that you have at least a basic grasp of what the individual components inside of your PC do and how they function together to make it all work. If you don't care about this stuff, well, you should still read this section anyways!
I've also put together a checklist that you can use to make sure you've got all of the basic components that you need, you can download it by right clicking this link and clicking "save link as...".
Alternatively, I've also put together a more condensed run-down of the list of parts needed to build a computer that you might find quicker.
Processor (CPU)
Your CPU, or processor, is essentially the brain of your computer. It tells everything what to do, and when to do it... most of the time. It's easily one of the most important parts of a gaming PC as it affects both your general use speed and gaming performance.
But, it's not THE most important part - not in a gaming PC at least.
 When it comes to gaming, you're generally going to be looking for the strongest "single core" performance that you can find within your price range. More often than not this will be an Intel CPU as they're generally putting up the best numbers in terms of gaming performance as of right now. However, AMD have been taking huge strides and have quickly been catching up with Intel in raw gaming performance.
Your processor is one of the last things you want to skimp in a gaming PC build, but you don't want to go over the top either. Most of us don't need to spend that extra $80-$100+ on an i7 over an i5, that little bit of performance you'll gain just isn't worth the cost yet - not unless you're streaming, recording/editing/rendering gameplay, or other CPU intensive tasks, then you might want to consider the i7 upgrade.
One thing to keep in mind is that processors use different types of sockets that are only compatible with the right motherboard, the 6th generation Intel i3, i5, and i7 (like the i5 6600) use the LGA 1151 socket, for instance. Where the older AMD FX 6300 uses the AM3 socket. When picking a processor, make sure it shares the same socket as the motherboard that you plan on using.
Lastly, if you're planning on overclocking your CPU, you have to make sure that you have the right tools for the job. Not actual tools... But the right model of CPU and a motherboard which supports overclocking. With Intel CPUs you have to get one with a "K" after the model number, like the i5 6600K. This means that the chip has been tested and proven strong enough to support the stress that overclocking creates. When it comes to AMD CPUs, pretty much anything can be overclocked assuming you have a good aftermarket cooler.
Motherboard (Mobo/MBO)
Motherboards are either the most overlooked or overestimated part of a build, depending on who you ask. It's definitely an important piece in any event, but not so important that you have to go spending $300 on a board that'll perform no differently than a $100-$150 alternative... Unless you really really want to for aesthetic purposes.
 Picking the right motherboard usually means finding one that offers the features you're going to use, and the ones you potentially see yourself using at some point. This includes things like the proper socket for your CPU, the right chipset to support your CPUs features, enough SATA headers for your storage, the audio support that you need, and the look you're after.
Desktop motherboards come in 4 primary sizes, mini-ITX, micro-ATX, ATX, and extended-ATX, with mITX being for small HTPCs or other compact designs, and eATX being so big that most of us will never have to use one. There are no real standards for size specifications within these classifications either, and it's very common to see differences in width or height when comparing 2 different, but "same sized" motherboards. Micro-ATX and ATX motherboards are the most common and this is more than likely what you'll be using in your build.
Larger profile motherboards will generally have more room for expansion for obvious reasons, but that doesn't mean you can't find say an mATX motherboard with roughly the same amount of slots/ports as an ATX motherboard if you were trying to build a more compact PC in an mATX-sized case.
To summarize, your motherboard has to support what you're going to be adding into your PC and it has to be the right size for your case (or vice versa). Other than that, you don't have to spend an arm and a leg on your mobo as most $70-$150 boards will work great depending on your build's requirements.
Graphics Card (GPU)
What is a graphics card? Well, Your graphics card is by far the most influential and important component in terms of gaming performance in your whole PC, without a graphics card, well, you simply don't have graphics, which means you don't have games.
 I don't personally get into the old AMD vs. Nvidia debate, and I simply let benchmarks do the thinking for me a lot of the time. If one side produces higher numbers than the other on a consistent basis, great! But, if I were to not want to pick the better performer based on a name, well, that would just be silly.
Graphics cards are similar to CPUs in the sense that you can't compare different brands "number for number" - an 8GB RX 580 isn't automatically better than the 6GB GTX 1660 Ti, for instance. Again, another reason why it's best to watch/read benchmarks when it comes to picking your graphics card, make sure its the best performer within your price range.
You can usually expect to invest a big portion of your budget into your graphics card, it's not uncommon to spend 25% or more on this one part alone.
System Memory (RAM/Random Access Memory)
RAM is where bits of data are temporarily tucked away until its needed again. Without enough RAM in your system, you don't have enough room to store this temporary data which just isn't a good story if we're talking gaming, and we are.
 You don't need insane amounts of RAM to achieve that nice smooth 60fps experience that you're aiming for, though, 8-16GB is the perfect amount depending on your budget. If you're doing a lot of multitasking, you definitely want to be closer to 16 than 8.
We're at the stage now where DDR4 RAM is the standard in new builds as the most recent Intel and AMD CPU processors require it to function. Meaning, the motherboards which are compatible with the new Intel and AMD CPUs are only ever compatible with DDR4 RAM - sorry, your old sticks of DDR3 can't be reused anymore.
Storage (HDD/SSD)
Storage comes in a few different forms, from SATA-based HDDs and SSDs, to more advanced M.2 drives. Picking the right setup will make a big impact on your experience, so it pays to know what you're looking for.
 Standard hard drives (HDD) are almost always the most cost-effective storage solution while being the slowest internally mounted option. They're great for storing music, movies, and pretty much anything else you would want to store.
Solid state drives, or SSDs, are the fastest storage option that we have access to, but they're also the most costly with a 240GB SSD costing about as much as a 1TB HDD. Because of their speed, solid state drives work best as your "boot drive" and a place to store your essential programs and most importantly your operating system.
In short, SSD vs HDD is a size vs speed vs price comparison. Their differences are fairly basic, SSDs are always way faster but HDDs offer much more space per dollar spent.
Running a combination of an HDD and SSD is common practice to get the best of both worlds, both room and speed. If you're just looking to run an SSD as a "boot drive" only, 120GB will be more than enough to suit your needs. You could also run 2x HDDs or 2x SSDs in a similar setup. You're only limited by how many SATA data lanes your motherboard can support.
Power Supply (PSU)
Your power supply is probably as important as you're assuming it is - very important. Without a good quality supply, you run a higher risk of potential failure which could lead to parts being damaged. Not ideal. That's why you should never buy less than a quality 80+ Bronze rated power supply.
 Like almost any other computer component, power supplies come in a few different styles, non-modular, semi-modular and modular are all terms you might read on a power supplies spec sheet. The difference is that non-modular power supplies' cabling is permanently attached, semi-modular supplies only have 1 permanently attached, and modular power supplies can be completely customized to suit your needs with 0 permanently attached cables.
When you're picking out your power supply, you can usually add the TDP of your CPU + Graphics card(s), add ~200W and you'll be good to go. It's always better to have and not need than need and not have. Furthermore, you don't really want to be running your supply at more than 80-85% load for extended periods for efficiency reasons.
Your power supply is the last part you want to skimp on as it could take your entire PC out if it shorts! With that in mind, it pays to have a good power supply.
Case
Your case is where everything is housed, and it's also the part of your PC that everyone is going to see more than any other part. That said, it pays to look around at different cases until you find the exact one that really fits that specific look you're after.
 Picking the right case isn't as simple as just how it looks, though, and there are a few things you should take into consideration before making your final decision.
Airflow is one of the biggest factors you should consider when picking out your case, without proper airflow your components run hotter and ultimately don't last as long as they would otherwise.
There are also many different sizes of cases with support for different sizes of motherboards. Some people might only need a smaller Micro-ATX case. But others might need the space of a mid-tower ATX case or larger! This is something else you have to consider as some cases might be too small for your motherboard or other components, or they might be way too big for what you need. You usually want to match up your case size with your motherboard; but in some instances, you can use smaller motherboards in bigger cases without any issue.
Another thought to keep in mind is the location of the front i/o panel, and the connections that it supplies you with. Think of where your case will be located, would it be more convenient to have that i/o panel on the front or the top of the case, or maybe the side? All of these are options and having the i/o panel in a bad spot could negatively impact your experience, which is definitely not what we want! When it comes to the connections, you generally want a couple USB 3.0 (blue ports) and at least 3.5mm audio in / mic ports.
A lot of cases come packing fans with LED lights, more often than not these lights are only a single color and this can sometimes really suck when you like the case but not the color... Or does it? Nope! Case fans are super easy to change and there are lots of aftermarket options available in both single color and RGB configs, but there's a lot to consider when picking fans also, so I'll cover them in more depth further down.
Lastly, lots of cases come without a 5.25" bay for optical drives (DVD, CD, etc), this is partly due to internal drives becoming obsolete and partly for you to fit bigger radiators for your cooling system or whatever else you might want or need to mount there. If you use an internal optical drive on a regular basis, you definitely want to make sure that your case has a 5.25" bay.
To recap, you want a case that YOU like the looks of, has ample airflow, a conveniently placed i/o panel with the connections that you'll need and most importantly room for everything that you plan to mount inside.
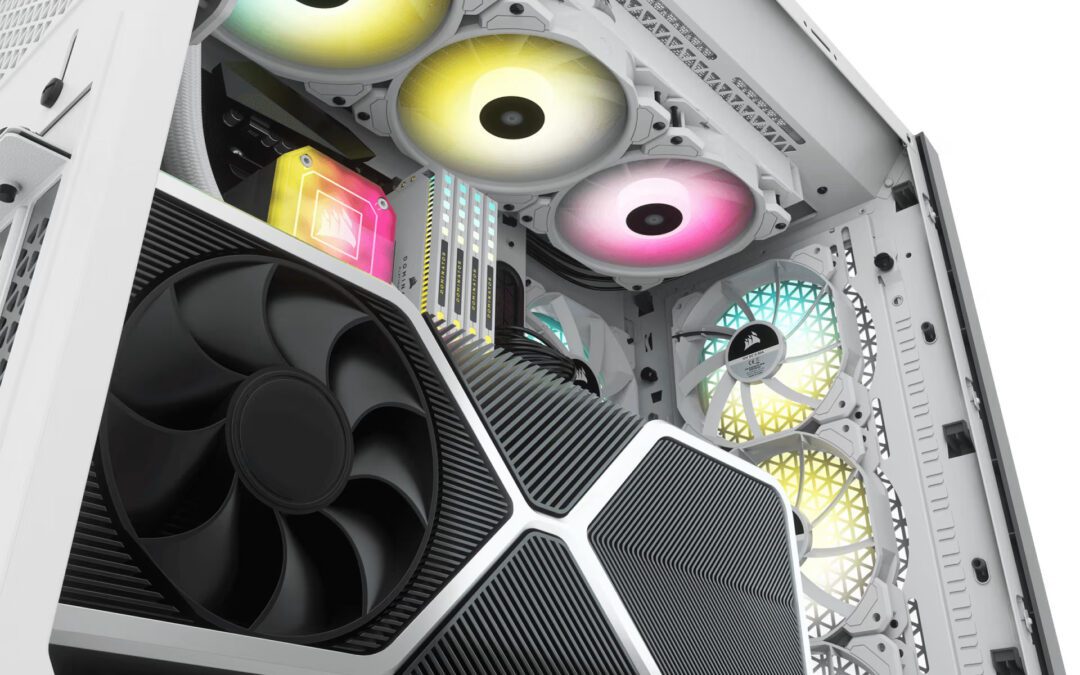
CPU Cooler and Case Fans
The vast majority of CPUs come with a stock CPU cooler/heatsink. There are only a few that do not. Similarly, most cases come with one or more fans. But, being a PC gamer is about customization and both of these components can be easily swapped out for something more appealing to your specific tastes or needs.
 CPU coolers work to pull the heat generated by your processor away to be sucked out as exhaust air. Case fans work to ensure that you get enough air into your case, and that enough air is exhausted out.
There's a wide array of aftermarket CPU coolers available for you to choose, from basic air cooling units like the Cryorig H7, to more intricate liquid cooling units like the Corsair H100i. But, not every cooler will fit into every fcase, and you have to make sure that you have the room for the radiator or heatsink that you're going to install.
Case fans with RGB/LED lighting can give a PC great feature lighting. Some people like them, some people don't. Whichever you are, there are definitely going to be some aftermarket fans that you'll like, whether that's visually or in terms of performance. If you don't care for LED/RGB lighting and you just want top quality, always go for Noctua.
Optical Disc Drives (ODD)
An optical disc drive is what you use when you need to write or read from DVDs, CDs, Blurays, and other disc-based platforms.
Once the standard, internally mounted 5.25" optical drives have slowly become obsolete. The majority of modern case manufacturers have been omitting the 5.25" bay which has slowly but surely made internal ODDs less common.
That said, external disc drives have become much more common and much less expensive than they once were. You can usually find them starting around $20 and it's definitely something that I would suggest adding to your build, even if you don't think you'll need it.
WiFi adapters, sound cards, etc
Most motherboards do not come with on-board WiFi - although some of the more "premium" options do. Chances are, you're buying a motherboard that does not include WiFi. If this is you and you need to use WiFi then you'll need an adapter. WiFi adapters can be either internally mounted via PCI slots, or externally mounted via USB ports.
Sound cards are only necessary if you're working with very high-end audio equipment. An example would be if you're buying a $500-$1000 pair of professional-grade audiophile headphone... Or you're an audio engineer. Otherwise, the vast majority of (if not all) motherboards will be able to handle your audio peripherals without a problem. That being said, not all motherboards come with support for 5.1/7.1 sound systems, or optical audio connections - make sure your mobo supports what you need!
On top of WiFi adapters and sound cards, you can also add things like dedicated fan controllers, RGB LED lighting and/or RGB controllers to your build.

How to build your own gaming PC
Now that the basics are out of the way, you should have a pretty good idea of the different components going into your new gaming PC, so now it's time to get into the fun stuff - finally building your new gaming PC!
Prepare
Before you jump in and start ripping boxes apart in a mad rush to get everything up and running as quickly as possible, stop! First, you really have to clean a couple of those cans up and maybe put those dishes in the dishwasher, that way we'll have enough rroom to operate! We need lots of room to make sure everything goes smoothly.
Next, you want to make sure that you have the right tools in order - the right tools consist of a #1 or #2 Phillips screwdriver... It's a lot, I know 🙂 Other things that might help would be a small flash light, some cable ties/zip ties for cable management, and a pair of needle nose pliers just in case.

If you're going to be standing on carpet while building your new PC, but you have the option to stand on some hardwood of laminate instead, do that. Not only does it make it harder to lose screws & such, but you generate much less static when you're not on carpet, and static is the enemy of your new PC! If this isn't an option, or even if you're feeling extra cautious, you will want to pick up an anti-static wristband.
Prepare ... PT.2
Ok, we're still not done preparing yet, but we're getting closer and closer to the fun stuff with every paragraph!
Now that we have a clean workspace, it's time to start slowly unpacking your components. Personally, I like to unpack everything completely before moving on, but feel free to unpack things as you need them. The big thing is to keep any hardware that comes with your components in their original bags and with the component they came with - this will make your life much easier in about 5 minutes.
Next, you want to pull out the motherboard's manual (at the very least) and read through it a bit, or just find the diagrams which show where you'll be plugging things in - all motherboard manuals have diagrams like these and they're crucial if you want your build to go smooth! You're going to have to refer to the motherboard's manual a few times while putting your PC together, so keep it somewhere handy. Serious, that manual is like gold when you're building a PC, especially for the first time.
Time to build!
The moment we've been waiting seemingly forever for is finally here! Time to put this beast together and see what it can do! Just follow along with the 5 steps below and you'll be up and running in no time!
I will have a video outlining this process sooner than later. Hopefully sometime sooner than later!

Step 1: Motherboard Setup
Step 1 is all about getting some components mounted on your motherboard and ready to be installed into the case. It's much easier to go this route than trying to install thing after the mobo has been mounted.
Personally, I like to use the motherboard's box as a place to sit the motherboard while I'm installing the initial components, you might find this works better and also protects your mobo from damage during this phase of the build.
Moving on!
1.1.) First, you'll want to install your processor by opening the locking arms, removing the black plastic cover and slowly lowering the CPU into the socket making sure to match up the arrows (one on the CPU and one on the mobo). Once your CPU is in place, you can lock it down using the tension arms to secure it.

See the notch?
1.2.) Next, you'll want to install your RAM into the appropriate slots. Usually this is the 1st and 3rd, or 2nd and 4th slots, but your motherboard's manual will tell you exactly which ones to use. Also, keep in mind that there's a notch in the socket and on the actual stick of RAM that you must line up for the RAM to go in properly (or at all).
1.3.) Now you'll want to mount your CPU cooler, if you're using the stock cooler you don't have to worry about thermal paste, but if you're using an aftermarket cooler this is when you'll apply a pea/grain of rice sized amount of thermal paste to your CPU before mounting the cooler. removing the fans temporarily is often a good idea as it'll give you much more room to work, and putting the fans back on isn't too difficult once the motherboard has been mounted.

1.4.) Lastly, you'll want to take your motherboard's I/O shield that it came with, and push it into the opening in the rear of your case - some will mount from the front and some will mount from the rear. Some motherboards will come with the I/O shield pre-mounted.
Done! Your motherboard is setup and ready to be mounted. That wasn't too hard, now was it?
Step 2: Mounting your Motherboard
2.1.) Before we actually mount the motherboard inside of our case, we're going to take that PSU and mount it first. If your PSU mounts on the bottom of your case, face the fan up*, and if it mounts on the top, face it down, then just secure it with the screws that it came with and you're done!
*More often than not, you'll want to face your power supply down in a bottom mounted config, but that depends on the case you're using - if it has venting for the PSU's fan to bring air in from the bottom, mount your PSU with its fan facing down.
2.2.) Now it's time to double check that the standoffs inside of your case are positioned correctly for the size of motherboard we're using - chances are you're using an mATX motherboard in an ATX case and the standoffs will have to be moved. But, if you're using an ATX case + ATX mobo then you should be good to go without changing a thing. Still, double check just in case.
2.3.) Now time to start lowering that mobo into your case, making sure to feed the various rear ports on the i/o panel through the i/o shield before securing the motherboard to the case using the short flat screws your case came with.

2.4a.) Now would be a good time to put your CPU cooler's fan back on (if you removed it) and plug it into the "cpu_fan" header.
2.4b.) Alternatively, If you're running an AIO liquid cooler, don't mount your cooler/radiator until just before mounting your GPU or its tubing will likely get in the way.
Another set of steps done! We're getting close now!
Step 3: Graphics and Storage
We're already this far? Wow! We're almost done!
3.1.) If you're horizontally mounting your GPU, now it's time to do that! This part is super easy, but it can be a little annoying sometimes as well. The #1 thing is to be slow and careful.
You'll be plugging the graphics card into an open x16 PCIe port; I'm sure you know what it looks like based on what the graphics card's connection looks like, if you don't there's a diagram above under the "motherboard" tab which shows you what it looks like. You'll want to make sure to start from the rear, fitting the display outputs through your i/o shield before pushing the graphics card into place. Once it's in place, secure it in with any hardware you removed to install it, and voila, graphics card installed! Well, it will need power, but we'll get to that part enough.
If you're going to vertical mount your GPU, don't install it or your x16 PCIe riser until all of your motherboard connections have been plugged in, especially the ones along the bottom of the board. Ideally, it should be the last part installed as it'll make cable management a pain otherwise.

3.2.) If you haven't already, now you can lock in any HDDs or SSDs you have ready to install. Make sure the ports are facing the non-windowed side of your case for easier cable management. Some cases will use hardware to secure your drives, but some will use toolless designs requiring no hardware at all. Sometimes you might have to remove a mounting bracket and screw your drive to it. It just depends on your case.
If your case has rear mounting options, having your ports face down can often be the best option for cable management.
3.3.) If you're using an internally mounted optical drive, now if the time when you'll want to slide it into position in your 5.25" bay - some cases will have you mount it from the front, some will mount from the rear.
Done and done! On to step #4!
Step 4: Cables and Cable Management
Cable management can either be the best, or the worst part of a build depending on the type of person you are. On one hand, you're almost ready to turn your build on, but on the other hand, cables... So many cables...
It's not too hard to have relatively decent cable management if you make sure to use the tools at hand, like any ties you have have, and the little eyelets that'll be all over the backside of your case (behind your motherboard).
Pretty much all of your cables will run behind your motherboard before coming out to plug into it, this is also the best way to ensure a clean looking build.
There is no particular order in which you should plug your cables in, it just depends on your motherboard's setup and the orientation of your components. The main thing is that everything that needs power, gets power, and everything that needs to be plugged in, is.
You'll want to make sure all of these are connected:
- 24-pin ATX power
- CPU power
- Graphics card (sometimes it takes 2 connections)
- HDD and SSD (both require SATA power and SATA data to the motherboard)
- Optical drive (same power as HDD/SSD, also requires SATA data to motherboard)
- Fans/CPU cooler
- Front I/O connections (your motherboard's manual will tell you where/how they go)
- Fan controller (if applicable)
- RGB controller (if applicable)
If you're vertically mounting your GPU or using an AIO liquid cooler, now is when you would want to install those.
Once you have everything supplied with power, it's time for the moment of truth! Plug your power supply into the wall/surge protector/UPS or whatever you'll be using, flip the switch on (the | not the O), and press the power button! Everything should buzz to life and look like it's working!

If everything worked and you're happy with your cable management, we're about to move onto the final step, so lets go! Turn that idling PC off, hook up your monitor (to the graphics card, not the motherboard), keyboard and mouse, and get ready to sit around and wait!
Step 5: BIOS, Windows, and Drivers
Wow, we made it! I knew you could do it, didn't even have a stitch of doubt about that! Now comes the "sit around and wait" part of the build that'll probably be super painful as you watch everything install and reboot half a dozen times, but, we're so close!
Now that you have your monitor hooked up, your keyboard and mouse plugged in, it's time to get technical! But... Not that technical because it's a lot easier than you're currently thinking it might be.
5.1.) You'll want to reboot/boot your PC and enter the BIOS, this is done by hitting a key during the first loading screen, sometimes its "del" sometimes it's "F9" or "F10", it just depends on the make of your motherboard - the manual will tell you which key to press and you should see a prompt upon booting. Some motherboards will boot right into the BIOS and you won't have to press anything.
5.2.) Once you're into the BIOS, you'll want to navigate into the "boot/startup" section and select either your optical drive, or USB flash as your primary boot source, depending on what kind of Windows installer you picked out. Make sure you hit "f10" (usually) to save, exit the BIOS, and reboot.
5.3.) Now you'll want to put your operating system installer in, whether that's a USB flash drive or DVD, when your PC boots it will ask if you want to boot from the installer and you want to hit "yes". From here you just want to follow the on-screen prompts to install your OS, just make sure you select your preferred boot drive as the install destination if you're using more than 1 drive.
5.4.) Upon installing, Windows should grab the majority of the basic drivers that you need to get up and running, but sometimes it will miss something crucial like a LAN driver, which makes it so you can't access the internet to install/update other drivers, in this case, you'll have to use the motherboard's disc to install those drivers and update them later. This is why it's a good idea to have a cheap external optical drive kicking around at the very least.
Assuming you were able to successfully install Windows and get your drivers updated, guess what? You just built and setup your very own gaming PC! How does it feel? Probably really nerdy, no doubt.
5.5.) Once your PC boots into Windows (or whichever OS you've opted to use) the absolute FIRST thing you want to do is GET YOUR DRIVERS! The most important drivers you'll want to update right away are for your GPU - go right to Nvidia or AMD and download the newest version available.
Conclusion
Well, that's that! Now you're up and running and it's time to get gaming! I bet it wasn't even half as difficult as you thought it was going to be before we started, was it?
One last suggestion before you start downloading every game possible overnight, Windows Defender is pretty decent but if you want to go with something different, another good anti-virus is Avira. It's really decent and you can get it for completely free, it's what I use and I've never had an issue!
I hope that you found this guide useful and that it succeeded in getting you through the build process with a minimal amount of frustration! If you have any questions about anything in this guide, feel free to ask me about it in the comment section!
If you're reading this before checking out my custom builds, you should definitely check them out! From cheap builds for $400 to insanely powerful builds for $2500 and up, you'll no doubt be able to find one to fit your needs 🙂
For any questions see our PC build FAQ.


So totally new to PC gaming. Mostly wanting to play vr gaming on it. I was just wondering which of the builds you have listed would be the best one to run VR gaming but won’t break the bank?
The lowest point you’d want to go for a VR gaming build is $800. That way, you’re getting a GTX 1660 Ti graphics card which meets the recommended specs for the more demanding VR titles.
Better yet would be my $900 build as it comes with an RTX 2060 which is a fair bit more powerful than the 1660 Ti.
That all said, I’d consider the $1000 build as the sweet spot for VR due to its far superior GPU in comparison to the $900 and $800 builds.
Hope that helps! If you have any further questions, don’t hesitate to ask 🙂
Thanks alot for sharing your thoughts.
Thank you for the obvious amount of time and effort that you put into this website that has made my life way easier.
You’re welcome, Kavish! I’m glad I could help 🙂
Hey Branton,
I plan to upgrade from an HDD boot drive to an SSD, but I’ve got a question. I don’t feel like downloading the drivers for my motherboard from the manufacturer website and I’ve never updated them in my current build from the original cd that came with the MB. Will using the drivers from the cd cause any Issues or has windows 10 been updating my MB drivers and I just never knew? Lol
Thanks in advanced!
-Turtle
Hey Turtle,
Using the drivers from the CD won’t cause any issues, but they generally won’t be better than what Windows installs/what’s installed by default. It’s always a good idea to install the newest BIOS revision possible as they often come with performance improvements.
Hope that helps!
Hi, I am relatively familiar with the PC world, but have never built one myself. I have unfortunately been a console “peasant” for the past two years while I saved money here and there for a gaming setup. I eventually gathered up around $1,000 for my build and have decided to go with the MSI B450M Bazooka motherboard, EVGA 600BQ PSU, and the EVGA GTX 1070 SC Gaming GPU. Will this work/fit in the NZXT H500? It said that it was mATX compatible but I am just making sure that my build goes smoothly and I won’t be jumping around in-between finding what fits and what does not.
Thanks!
Hey Ethan,
There’s nothing wrong with gaming on consoles, I do it all the time to cash in on the better exclusives! That said, welcome to the better way to game 😀
Your build will definitely fit inside of the NZXT H500. When you get your case, you’ll notice there are small pegs – called standoffs – installed where you’ll be mounting your motherboard. Those will come in an ATX configuration by default, but all you have to do is move them to the mATX positions (they’ll be marked) and your mobo will mount perfectly.
I hope that helps! If there’s anything else, don’t hesitate to ask!
Hi,
I remember seeing a link to a how-to video on this website about putting together your pc. Do you still have it or know the name of the video? Thanks.
Hey John,
I think you’re referring to this video?
But, there are lots of others that are more updated that you could follow along with instead!
Quick question, if i have a prefab pc, and it has its os on a hard drive, could i get an ssd and move the os to it?
Hey Mike,
Yep, that’s definitely something you can do. There are basically 2 options. You could use a cloning/migration utility like EaseUs or an equivalent, or you could do a clean install which is a little more involved but also more reliable.
Hey Branton,
Intel – Core i5-7600K 3.8GHz Quad-Core Processor
Cooler Master – Hyper 212 EVO 82.9 CFM Sleeve Bearing CPU Cooler
Gigabyte – GA-B250-HD3 ATX LGA1151 Motherboard
Team – Vulcan 16GB (2 x 8GB) DDR4-2400 Memory
Western Digital – Caviar Blue 1TB 3.5″ 7200RPM Internal Hard Drive
MSI – GeForce GTX 1060 6GB 6GB GAMING X Video Card
Cooler Master – MasterBox 5 (White) ATX Mid Tower Case
Corsair – TXM Gold 550W 80+ Gold Certified Semi-Modular ATX Power Supply
Is this a good pc build? I want to be able to use the HTC vive and be able to run new and upcoming games on high and ultra.
And will it be compatible with the HTC Vive? Even if the HDMI port is already in use?
G.Skill – Ripjaws V Series 16GB (2 x 8GB) DDR4-2400 Memory is my new ram.
i think it would just be best of me to look at the 1000 build and take off the ssd. I am would have to use my tv, so what would be the best way to connect them without using the HDMI.
Hey Dawson,
Your build looks good! It’ll definitely work with the HTC Vive, the GTX 1060 can handle VR without an issue.